A good landscaping service can transform a tired yard into a place you want to linger. That transformation moves faster, costs less, and lasts longer when the site is properly prepared. I have walked into jobs where two hours of prep by the homeowner saved a full day of crew time. I have also seen the opposite, where hidden irrigation, buried debris, and unclear boundaries turned a straightforward project into a budget-eating tangle. Preparation is not glamorous, but it is the lever that moves everything else.
This guide walks through the preparation that leads to clean edges, tidy timelines, and predictable results. It covers everything from defining the scope with your landscaping company to clearing utilities, pruning, and staging materials. It applies whether you are booking a one-day spruce-up, ongoing landscape maintenance services, or a full redesign with new hardscape, lighting, and garden landscaping.
Start with scope, not sketches
Before a shovel hits the ground, agree on what you want built, what you want kept, and how the crew will move through the property. Scope is not just a drawing or plant list. It is the rules of engagement.
If you have landscape design services involved, ask for a working document that says what goes where and which existing items are staying. If you are hiring a landscaping service for refresh and clean-up, write a one-page brief that covers the zones to address, the budget range, the materials you prefer, and any no-go areas. When clients skip this step, small misunderstandings multiply: a “light prune” becomes an aggressive reduction, a “simple mulch” becomes five yards on the wrong side of a fence.
Be specific about the following: turf areas to remove or keep, trees to protect, beds to add, materials you like or dislike, and any low-maintenance or native-plant priorities. If you want lawn care integrated into the visit, note mowing heights, fertilization preferences, or electric-only equipment requests. Map high-traffic patterns, such as kids’ play zones or dog runs, that should survive the project intact.
Walk the site with your contractor
An on-site walkthrough does more than an estimate ever could. This is where you resolve many of the “I thought you meant…” moments. Do it in daylight, plan for 45 to 60 minutes, and walk the sequence of work your landscaping company will follow.
Show crew access points, gates, driveways, and staging areas for soil, stone, or plants. Point out fragile features, like thin pavers that rock underfoot, a septic lid, or old clay drainage tiles. If you know about previous work, share the history. I once avoided a broken gas line because a homeowner remembered a trench from a 1980s pool heater that never got used. These tiny stories are practical risk management.
Agree on parking. A typical installation crew brings two to three trucks and trailers. Decide where they can park without blocking neighbors or sprinklers, and whether weekend work is allowed. If you live in an HOA, have approvals ready and post any required notices. If the project spans several days, ask how they will secure materials overnight. Clear rules upfront keep the neighbors happy and the site safe.
Permits, utilities, and property lines
Nothing slows momentum like a permit surprise or a cut cable line. Most softscape work and routine landscape maintenance services do not require permits, but walls, fences, steps, retaining structures, large tree removals, and new irrigation sometimes do. If there is any grade change over about 6 inches or any structure over a couple of feet, ask your contractor to clarify local thresholds.
Call before you dig is not optional. In most regions, utility marking services need 48 to 72 hours. If your landscaping service does not handle the ticket, you can. Markings are temporary, so time the call so the paint is fresh when work begins. If you have private lines, like low-voltage lighting or a private well feed, those will not be marked by public utilities. Share any diagrams you have, and if you do not, at least walk the crew through where transformer boxes, valve boxes, and controllers live.
Confirm property lines if your work touches a boundary. A six-inch encroachment with a new hedge can still cause friction. In tight neighborhoods, I have used a simple string line from known survey points to keep planting beds honest. If you plan a fence or masonry wall, ask for a survey or at least an offset agreement with the neighbor.
Access and staging make or break efficiency
Crews need clear paths to move soil, stone, and plants. A 36-inch gate looks wide enough, until you try to push a loaded wheelbarrow through a narrow turn while dodging a gas meter. Before start day, test the path. If it binds, discuss removing the gate temporarily or creating a temporary access ramp over steps.
Clear staging space for deliveries. A yard of mulch weighs roughly 500 to 700 pounds. Five yards becomes a small hill that cannot sit on soft lawn after a rain without rutting. Identify a driveway or street spot that can handle pallets and bulk deliveries, and if street staging is necessary, ask about permits or cones. For larger installs, schedule deliveries in phases to avoid crowding.
If you have pets or children, plan a safe perimeter. Latches should close, and gates should be self-securing. I advise clients to set up a temporary exercise pen for dogs in a quiet corner, away from the access path. It prevents escapes and lets crews move without worry.
Clear the clutter, selectively
A tidy site is not about impressing the crew. It is about letting them see the work. Remove toys, grills, planters you do not want used, lightweight furniture, and garden hoses. If you store items in side yards, stack them neatly in the garage or a shed during the project window. The rule of thumb: anything you would move for a party, move for the crew.
For items you want kept in place, tag them with blue tape or a stake. I keep a roll of painter’s tape in my truck for this. It prevents a cascade of “Where do you want this?” questions and ensures sentimental items are not accidentally tossed.
If you have seasonal decor wiring or ad-hoc drip lines snaking through beds, consolidate or remove them. Drip line that has been running loose on top of mulch turns into https://www.google.com/maps/place/Landscape+Improvements+Inc/@28.5686846,-81.4042863,17z/data=!3m1!4b1!4m6!3m5!1s0x88e77a69665ff291:0x8c7e19edfe885d9d!8m2!3d28.5686846!4d-81.4042863!16s%2Fg%2F1tl9nd73?entry=ttu&g_ep=EgoyMDI1MDgyNC4wIKXMDSoASAFQAw%3D%3D spaghetti when crews rake. Coil it, label it, and set it aside with a note.
Protect what stays
Some features should not be moved or cannot be replaced easily. Focus protection on tree trunks, root zones, masonry edges, and fragile façade materials. Wrap trunks near working areas with breathable tree guards, not plastic film. Lay down plywood runways for wheelbarrows across lawns you want to protect, and double them over soft ground after rain.
If you have existing stone or brick borders that will remain, photograph them up close before work begins. Good crews are careful, but edges get hit. A photo helps match the pattern if something chips and needs resetting.
For pools and ponds, cover skimmers and inlets and turn off automatic cleaners. Dust, sand, and cement fines can damage equipment. If the crew will be cutting pavers or stone, ask them to set the saw station downwind and away from doors and windows.
Irrigation and lighting: map, test, and label
Underground systems are the hidden veins of a yard. A little time here prevents leaks and delays. Run your irrigation controller through each zone and note any heads that do not pop or that hiss when they should be quiet. Mark sprinkler heads and valve boxes with flags. In turf, flags keep string trimmers from decapitating heads; in planting areas, they keep shovels from puncturing laterals. If you do not have flags, wooden stakes or even short bamboo stakes work.
If the project includes new planting, ask whether the crew will cap or convert existing irrigation. A common oversight is leaving turf rotors in beds where new shrubs go. Rotors drown shrubs. Spray patterns need tuning, and drip zones often need to be extended. Plan a controller reprogram after installation. With new plants, shorter, more frequent cycles in the first two to four weeks help roots settle, followed by deeper, less frequent cycles.
For low-voltage landscape lighting, locate the transformer and label circuits. If any fixtures are dead, tell the crew now. It is easier to rewire with trenches open. If your landscaping company will install new lights, agree on fixture placement during the walkthrough. Use stakes with labels to show exact spots.
Soil reality check
Soil is the quiet decider of plant success. Before planting, test a few spots by hand. If a shovel bounces, you probably have compaction that needs mechanical relief. If you pull up a wad of clay that holds its shape, add organic matter and consider ripping with a broadfork or a small tiller set shallow, especially in beds. If the soil is sand and flows like sugar, plan for compost and mulch to improve water retention.
For clients who want low-input garden landscaping, I recommend a simple soil test panel. You do not need a lab for every bed, but one or two composite samples can identify extreme pH or nutrient issues. If pH is far off, a plant list adjust is cheaper than fighting soil chemistry for years. For example, if your soil runs high pH, Mediterranean plants thrive, while acid lovers struggle.
Plan for enough compost. As a baseline, two inches across new beds gives you a meaningful improvement without burying roots too deep. For lawn care renovations, a topdressing of a quarter to half an inch post-aeration can change the game in a single season.
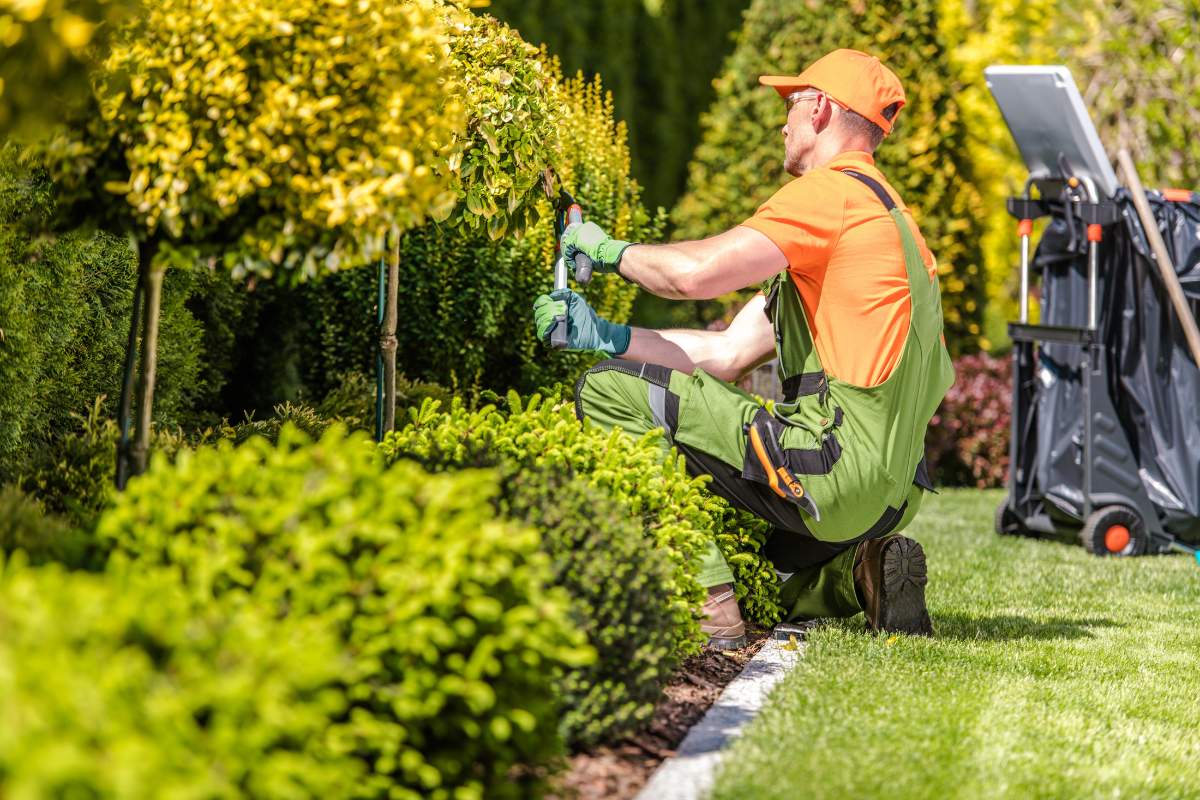
Pruning, removals, and tree protection
Homeowners often ask whether to prune before or after the crew arrives. If you have a landscaping service scheduled primarily for planting and bed work, do the heavy removals ahead of time. Removing an overgrown shrub opens space and reveals the real contours of the bed, which leads to better placement. For mature trees that need major cuts, bring in a certified arborist, then let the landscaping company work after the canopy is stabilized.
Light shaping cuts can wait until after planting to balance forms. Do not prune flowering shrubs right before bloom if the bloom time matters to you. Timing matters: late winter or very early spring for structure, after bloom for fine tuning on spring bloomers, and mid to late summer for many hedges. If you are unsure, ask the crew lead to mark what they plan to prune, then approve before cuts.
For tree protection, keep foot traffic and wheelbarrows outside the drip line if possible. Roots live in the top foot of soil, and compaction is damage you cannot see until leaves yellow in midsummer. Temporary mulch paths reduce compaction, but nothing beats rerouting traffic.
Manage water before plants arrive
One of the biggest mistakes I see is ignoring drainage until the last minute. Plants hate wet feet. Lawns puddle. Hardscape heaves. Before the project starts, observe your yard after a long rain. Mark low spots, soggy seams along foundations, and areas where downspouts dump water. Share this with your landscaping company.
A basic French drain or a re-graded swale can move water where it belongs. If you plan to lay sod, fix grade first. A half-inch of grade error at the wrong spot will send water toward the house. Use a long level or a tight string line to visualize pitch. Over a 10-foot run, aim for a drop of 1 to 2 inches toward a drain path. If the crew plans to install a dry well or catch basin, confirm discharge points, and ensure they do not send water onto a neighbor’s property.
Plant choices and staging
If you are working with landscape design services, your plant list will include sizes, counts, and spacing. Ask for substitutions that keep the design intent while matching what is healthy and available at the nursery. Plants arrive in waves; one missing anchor plant can create awkward gaps. I often specify two acceptable alternates for key species, so the crew is not stuck when a grower sells out.
When plants arrive, stage them in the yard roughly where they will go. Group by exposure: sun plants together, shade plants in one spot, and edge plants near paths. Keep them watered and out of hot wind. Do not let nursery pots sit on hot asphalt all day. If delivery arrives a day early, a quick dunk or slow hose from a five-gallon bucket can carry them to morning.
Mulch should arrive last or at least sit out of the way. Spreading mulch before irrigation work is done creates extra labor. The same goes for decorative rock. Open the space for trenching, plant placement, and settling irrigation, then top off with mulch at the end.
Safety, pets, and neighbors
A working yard is a construction site. Treat it like one. Keep pets and children inside or in a controlled zone. Tell neighbors about loud phases, like demolition or paver cutting, and share the expected schedule. Most crews start by 7 or 8 a.m. If your city has noise ordinances, match start times accordingly.
For you and your family, plan alternative routes around the house during work. If the side gate becomes the main corridor for wheelbarrows, move your trash cans to another side for pickup day. If you have allergies, ask the crew to minimize leaf blower use near doors and windows, or schedule interior air purifiers to run during cutting phases.
Budget clarity and change management
Preparation is not only physical. It is financial. Clarify what is included: soil amendments, disposal fees, delivery charges, and permit costs. Ask how change orders are handled. I write projects with three buckets: base scope, optional upgrades, and unforeseen conditions. Base scope is fixed. Upgrades are elective, like choosing premium stone. Unforeseen conditions are roots, rock, or buried surprises. Agree on a per-hour or per-unit rate for those before work begins. It lowers the temperature when something pops up.
If you are bundling ongoing landscape maintenance services after the install, ask for a handoff sheet from the installation crew to the maintenance team. It should include plant lists with botanical names, irrigation schedules, fertilization timing, and any specialties like deer resistance strategies or pest watches. A good handoff preserves the investment.
Prep checklist for the day before
Use this short list the evening before work begins. It is fast, and it matters.
- Open and test gate locks, then remove or tie back gate springs for the day. Run the irrigation controller to flag heads, then turn the system off for the duration of soil work. Move cars from the driveway if deliveries are scheduled, and reserve staging with cones if needed. Pick up dog waste and remove loose items from beds and lawn to prevent accidents and delays. Take photos of existing conditions, including any cracks or delicate features, so you have a baseline.
Weather timing and soil moisture
Working soggy soil is a silent budget killer. It compacts easily, and wheelbarrow ruts become permanent. If heavy rain hits within 24 hours of your start, talk to the landscaping company about a short delay. Two dry days can mean the difference between workable and ruined. On the other side, parched soil can be stubborn. A deep watering the evening before digging makes planting smoother and less damaging to root balls.
Season matters. Spring and fall are gentler for planting in most regions, with cooler air and warmer soil in fall creating reliable root growth. Summer installs work, but they demand tighter watering and shading protocols. If a heat wave is forecast, set up shade cloth or ask the crew to stage plants under trees until holes are ready. Small moves like that save losses.
Lawn care specifics during construction
Lawns take abuse during projects. Protect turf that will remain by laying down plywood sheets or temporary mats along wheelbarrow routes. If your lawn is already weak, consider planning a renovation as part of the work. A smart sequence goes like this: complete hardscape and bed work, fix grades, aerate, topdress with a quarter inch of compost, seed or sod, and then set the irrigation to match the new schedule. For sod, water lightly three to four times daily for the first week, then taper. For seed, keep the top quarter inch consistently moist until germination, then move to deeper, less frequent cycles.
If you plan to overseed, coordinate with pre-emergent herbicide timing. Pre-emergents will suppress seed germination for weeks to months depending on the product. Your landscaping company can adjust timing or use starter fertilizers without pre-emergents to avoid conflicts.
Waste, recycling, and site cleanliness
Agree on waste handling. Yard waste can often be chipped or composted instead of landfilled. If you have a spot for a temporary brush pile, designate it. For concrete and masonry debris, ask about recycling options. Many regions accept clean concrete and brick for crushing and reuse. If you care about keeping materials on site, tell the crew. Old flagstone can become stepping pads near a hose bib. Weathered bricks make a handsome garden edge. Salvage keeps character and saves money.
Ask the crew how they leave the site at the end of each day. A tidy, swept path to the door and consolidated tool staging shows professionalism. It also keeps you safe when you walk out in the evening with a dog on a leash and not enough light.
Communication during the build
Even with good prep, adjustments come up. Give the crew lead a way to reach you quickly for decisions. Text with photos works well. If you can be available during the first hour on day one and for 10 minutes at the end of each day, you will catch most issues early. I have solved countless small headaches during a quick evening walk: shifting a bed edge by four inches to clear a downspout, swapping a plant pair for better scale, or moving a path light off a mower line.
If you will be away, designate a proxy with authority to approve small changes. Define what counts as small. For many projects, anything under a set dollar amount can be approved without a call, which keeps the crew moving and the schedule intact.
Aftercare: the first 30 days
The project does not end when the truck pulls away. The first month sets the trajectory. Keep irrigation schedules aligned with plant needs and local weather. Most new shrubs and perennials want consistent moisture without constant saturation. Trees want deeper, less frequent watering, typically one to two slow soaks per week depending on size and heat. Check soil with your hand. If it feels cool and slightly moist at two inches, you are on track. If it is soggy or bone dry, adjust.
Mulch settles. Expect to top off light spots by half an inch after two to three weeks. Watch for settling around new hardscape. A small low spot near a step can be corrected quickly now; left alone, it becomes bigger.
If lawn was part of the work, keep foot traffic light until roots knit. For sod, a gentle tug at the corners after 10 to 14 days tells you if it has set. For seed, wait until the first mowing height is reached, then mow with a sharp blade. Avoid herbicides in the first eight weeks unless directed by your landscaping service.
Common pitfalls and how to avoid them
Three mistakes come up again and again. First, underestimating access. A narrow gate adds hours of shuttling. Solve it with temporary gate removal or a path rebuild ahead of time. Second, ignoring irrigation conflicts. Rotor heads in shrub beds waste water and damage plants. Plan conversions. Third, imprecise edges. Without a painted line or a hose laid in a curve, edges wander. Crew leaders can read intentions, but they cannot read minds. A painted line takes five minutes and saves second-guessing.
A quieter pitfall is material mismatch. Natural stone varies, and mulch colors shift by vendor. If color consistency matters, ask for a sample bag or a single vendor source. If you are particular about gravel size, specify sieve sizing, not just a common name. “Three-eighths minus crushed basalt” means something specific. “Pea gravel” means different things in different yards.
When maintenance and design meet
A well-prepared site also sets you up for simpler maintenance. If you prefer landscape maintenance services to handle routine care, ask them to visit with the designer or crew lead during the final walkthrough. Maintenance pros see different details: mower turning radii, access to valve boxes, pruning windows, and mulching depth that allows easy refresh next season. Simple tweaks at the end, like raising a spray head or adjusting a path curve to accommodate a mower deck, save hours over a year.
If you handle your own lawn care or garden tasks, ask for a plant map and a maintenance calendar. Knowing that the new lavender should be sheared lightly after bloom in mid to late summer, or that the hydrangea is a type that blooms on new wood, prevents unhappy surprises. Good landscaping companies provide this without being asked, but asking ensures it happens.
A note on sustainability and water-wise choices
Preparation can tilt your yard toward lower water and lower inputs without sacrificing beauty. During the planning walkthrough, flag areas that could shift from high-water turf to low-water garden landscaping. Convert narrow strips along driveways to drought-tolerant plantings. Choose mulch over rock in hot microclimates to keep soil cooler. Install simple rain sensors or smart irrigation controllers. None of this requires a full redesign, and your landscaping service can incorporate these pieces efficiently when the site is prepped.
Soils prepared with compost hold more water, which reduces runtime. Group plants by water needs. If you mix thirsty and tough plants in one zone, you will either drown the tough or starve the thirsty. Zoning by exposure, soil, and plant palette is design, but it is also practical maintenance.
Final walkthrough and documents worth keeping
Before signing off, walk the site with the crew lead. Run the irrigation, test lighting, open and close any gates, and check that materials match what you agreed on. Look at plant health now, not two weeks from now, and document any concerns in writing. Ask for:
- A plant list with sizes, quantities, and substitutions, plus a simple care guide for the first season. An irrigation schedule by zone, with run times and frequency, and notes on emitter types. Warranty terms for plants and hardscape, and contact information for warranty claims.
Store these with your house records. When the next phase comes, or when you sell the house, this paperwork becomes a map that saves the next person from guessing.
Preparing your yard is the difference between hoping for a good result and setting the table for it. It is part planning, part housekeeping, and part neighbor diplomacy. Do the quiet work upfront, and your landscaping company can do its best work where it shows: in strong lines, healthy plants, efficient water use, and a space that feels right when you step outside.
Landscape Improvements Inc
Address: 1880 N Orange Blossom Trl, Orlando, FL 32804
Phone: (407) 426-9798
Website: https://landscapeimprove.com/